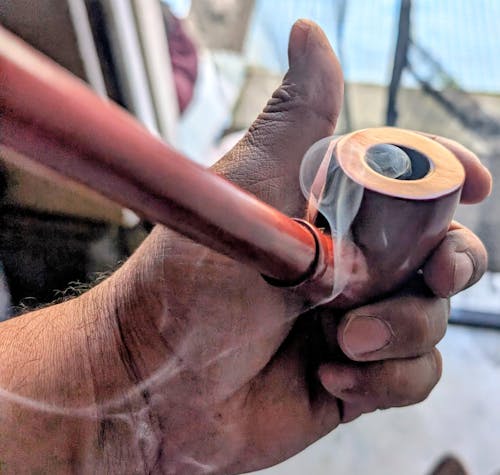
How to Clean a Plastic Weed Pipe: Step-by-Step Guide for Optimal Results

Cleaning a plastic weed pipe can feel like a hassle, especially when resin and debris build up. Many people don't realize how easy it is to keep their pipe fresh with simple tools.
This guide will show how to clean a plastic weed pipe step by step for the best results. Keep reading to make your pipe good as new!
What You’ll Need to Clean a Plastic Weed Pipe
Gather a few basic supplies to get started. These items will help remove buildup and leave your pipe fresh.
Isopropyl alcohol
Isopropyl alcohol works as a strong cleaning agent for plastic weed pipes. It helps break down sticky residue, oils, and grime left behind after use. As an alcohol-based cleaner, it acts as a disinfectant and degreaser, ensuring your pipe stays clean and hygienic.
Using 70% or higher isopropyl alcohol provides the best results for residue removal. Pour it into a sealable bag or container with your pipe, add coarse salt for scrubbing power, then shake well to loosen buildup.
Move on to preparing the full cleaning solution next!
Coarse salt
Coarse salt works as a natural scrubbing agent for cleaning plastic weed pipes. Mixed with isopropyl alcohol, it helps break down resin and buildup inside the pipe. The salt’s texture scrapes away stubborn residue without scratching the plastic surface.
Using coarse salt regularly keeps the pipe clean, maintaining both flavor and performance. It is an effective yet cost-efficient option for cannabis users. Moving forward, you’ll need a sealable bag or container to pair with this method.
Sealable plastic bag or container
A sealable plastic bag or container keeps the cleaning process mess-free. It holds the pipe and cleaning solution securely, preventing leaks or spills.
Choose a size that fits your pipe with extra room for shaking. This helps loosen resin and residue more effectively without splashing liquid everywhere.
Warm water
Warm water helps rinse off residue after cleaning. It loosens dirt and ensures the pipe is free from leftover alcohol, salt, or other solutions. Always use warm, not boiling water, to protect the plastic material.
Warm water works wonders for quick sanitization of your weed pipe.
Run it through thoroughly until no cleaning solution remains. This step ensures better hygiene and keeps your cannabis experience fresh and clean!
Cleaning brush or pipe cleaners
A cleaning brush or pipe cleaners are must-have tools for keeping plastic weed pipes clean. They help scrape out stubborn residue stuck in tiny spaces where fingers cannot reach. These tools ensure better hygiene and enhance the smoking experience by maintaining a clear airflow.
Using high-quality brushes or pipe cleaners prevents buildup that can affect performance over time. Flexible pipe cleaners fit into narrow passages, making it easy to remove debris from hard-to-reach spots.
Regular use of these simple supplies protects the pipe's condition and extends its life.
Step-by-Step Guide to Cleaning a Plastic Weed Pipe
Cleaning a plastic weed pipe is simple when broken into easy steps. Follow these instructions to keep it fresh and ready for use.
Step 1: Empty and rinse the pipe
It's important to start by clearing out your pipe. This gets rid of leftover cannabis and makes cleaning easier.
- Remove any leftover weed or resin from the bowl with a toothpick, paperclip, or similar tool.
- Turn the pipe upside down and gently tap it over a trash can to shake out loose debris.
- Rinse the pipe under warm running water to remove surface dirt. Move it around for better water flow inside.
- Ensure no small pieces are stuck before moving on.
Next step, get your cleaning solution ready!
Step 2: Prepare the cleaning solution
Cleaning a plastic weed pipe takes only a few steps. Preparing the cleaning solution is key to removing residue effectively.
- Pour isopropyl alcohol into a sealable plastic bag or container. Use enough to fully submerge the pipe.
- Add coarse salt to the alcohol. This will act as an abrasive scrubber when shaken.
- Mix the solution gently by swirling or stirring it until the salt spreads evenly inside.
- Ensure the container or bag is ready for soaking; check for leaks or cracks before use.
Step 3: Soak the pipe in the solution
Step 3 is all about soaking the pipe to break down gunk and resin. This step makes scrubbing easier and ensures a deeper clean.
- Fill a sealable bag or container with isopropyl alcohol. Make sure there's enough to fully submerge the pipe.
- Add one or two tablespoons of coarse salt to the alcohol. The salt acts as a gentle scrubber during the soak.
- Place the empty pipe into the solution carefully. Shake it slightly to let the salt move around inside.
- Let the pipe sit in this mixture for at least 30 minutes, but longer is better if there’s heavy residue.
- Check that every part, inside and out, is covered by the liquid for even cleaning.
Move on next to shaking and scrubbing any leftover stuck spots!
Step 4: Shake to loosen residue
After soaking the pipe in the alcohol solution, it’s time to dislodge any stuck residue. This step is key for a clean and fresh plastic weed pipe.
- Seal the plastic bag or container tightly with the pipe inside. This prevents any leaks while shaking.
- Hold the bag or container securely with both hands to avoid spills or accidents during shaking.
- Shake it vigorously for about 2-5 minutes to break up stubborn residue inside the pipe walls and corners.
- Check occasionally to see if debris is loosening, then adjust shaking strength as needed for better results.
- Repeat this process until most of the buildup appears broken apart and floating in the solution.
Proper shaking ensures thorough cleaning and removes old resin from hard-to-reach spots inside your smoking accessory!
Step 5: Use a brush or pipe cleaner for tough spots
Stubborn residue often remains after shaking the pipe in the cleaning solution. Focus on these spots with a brush or pipe cleaner to get it spotless.
- Grab a small cleaning brush or a pipe cleaner that fits into tight spaces. These tools help scrub away resin buildup inside the pipe.
- Gently insert the tool into every nook and cranny of the plastic weed pipe. Move it back and forth to loosen stuck residue without damaging the surface.
- Scrub areas such as the bowl, mouthpiece, and stem thoroughly. These sections may collect more resin during use.
- Recheck all parts of the pipe while scrubbing to make sure no sticky residue is left behind.
- If some spots still seem stubborn, you can dip your brush or cleaner in alcohol briefly while scrubbing for extra power.
- Continue brushing until surfaces feel smooth to the touch and look clean.
Proper tools save time during this step while protecting your plastic weed pipe from scratches or damage!
Step 6: Rinse thoroughly with warm water
After scrubbing the tough spots, it is time to rinse the pipe. This step helps remove all debris and leftover residue for a cleaner experience.
- Use warm water for rinsing the pipe fully. Warm water loosens any stuck residue better than cold water.
- Hold the pipe under running water. Make sure every part gets cleaned thoroughly.
- Rotate the pipe while rinsing. This helps wash away any debris hidden in small openings.
- Check if there are still visible particles inside or outside the pipe after rinsing.
- Run water through all parts of the pipe one more time if needed to ensure no residue remains.
- Avoid using boiling water during this step as it may damage plastic pipes.
- Set the clean, rinsed pipe aside on a towel to dry completely before use again.
Step 7: Allow the pipe to dry completely
Drying the plastic weed pipe is a key step to keep it clean and fresh. It prevents mold, odor, and ensures a better smoking experience.
- Pat the pipe gently with a clean towel to remove excess water. This helps speed up drying.
- Place the pipe in a well-ventilated spot where air can circulate freely around it. A windowsill or open counter works great.
- Avoid using heat sources like hair dryers or ovens to dry the pipe. High heat may damage the plastic material or warp its shape.
- Let the pipe sit undisturbed until it is fully dry inside and out. Any leftover moisture may cause bacteria growth later on.
- Inspect small crevices for trapped water droplets before use. A dry pipe means cleaner hits each time you smoke!
Alternative Methods for Cleaning Without Alcohol
Try simple household items or other methods to keep your pipe clean—discover easy options that work!
Vinegar and baking soda solution
A vinegar and baking soda solution works as a nontoxic, ecofriendly cleaning agent. Vinegar breaks down residue while also acting as a natural deodorizer. Baking soda is an abrasive cleaner that helps scrub away tough stains without damaging the pipe.
Mix equal parts warm water and vinegar in a container. Add two tablespoons of baking soda to create fizzing action for deeper stain removal. Soak the pipe for 30 minutes, then shake it gently to loosen buildup.
Use a brush or pipe cleaner for hard-to-reach spots before rinsing thoroughly with clean water.
Boiling water method
The boiling water method works well to clean plastic weed pipes. Start by heating water until it reaches a boil, then take it off the heat. Carefully place the pipe into the hot water and let it soak for several minutes.
The heated water helps loosen residue and buildup stuck inside.
This method avoids harsh chemicals, making it safe for plastic pipes. Regular cleaning with this technique can improve performance and keep smoking accessories in good condition. Always ensure the pipe cools completely before handling it to avoid burns or damage.
Tips to Maintain Your Plastic Weed Pipe
Keep your pipe fresh and lasting longer by cleaning it often, using gentle methods, and storing it properly.
Clean regularly to prevent buildup
Frequent cleaning stops residue from accumulating inside the pipe. Built-up grime affects its performance and ruins the flavor of each hit. Regular maintenance ensures it works smoothly and provides a better smoking experience.
Rinsing after every use can prevent stubborn buildup. Cleaning tools like soft brushes or pipe cleaners help clean hard-to-reach spots. Using warm water and safe solutions prevents damage to the plastic, maintaining your pipe in excellent condition for a longer period.
Avoid harsh chemicals to protect the plastic
Harsh chemicals can harm the plastic, making it brittle or discolored. Strong solvents may weaken the material, reducing its longevity and functionality over time.
Gentle solutions like warm water with mild soap work best for cleaning. Abrasive tools or cleaners should also be avoided to preserve the pipe’s integrity. Regular use of safe cleaning methods keeps performance and flavor intact without risking damage.
Store in a clean, dry place
Keep the pipe in a clean, dry spot to avoid damage. Moisture can cause mold, which ruins the pipe and affects hygiene. A dry area helps preserve its quality for longer use.
Storing it properly keeps contaminants away and protects against cracks or wear. This simple step improves maintenance and ensures better smoking sessions over time.
Explore Silicone Pipes as an Alternative
Silicone pipes stand out as a durable choice for users. Unlike plastic weed pipes, they are resistant to breaking and easier to clean. These pipes come in trendy designs and offer user-friendly features that enhance convenience.
Their durability makes them perfect for on-the-go use or clumsy moments.
Headshop.com offers various silicone options among its smoking accessories. They keep up with the latest trends, ensuring styles remain fresh and appealing. Maintenance tools designed for these break-resistant pipes also make cleaning simple.
Customers can enjoy both long-lasting quality and satisfaction with this alternative material.
Conclusion
Cleaning a plastic weed pipe is simple and worth the effort. A clean pipe gives better flavor, smoother hits, and keeps things fresh. Stick to regular cleaning habits, and your sessions will stay top-notch.
With just a little care, your pipe can last longer and work perfectly every time!
FAQs
1. How do I clean a plastic weed pipe without damaging it?
Start by rinsing the pipe with warm water to loosen residue. Use isopropyl alcohol and coarse salt as a cleaning solution. Gently scrub the inside with a soft brush or cotton swabs, then rinse thoroughly with water.
2. Can I use boiling water to clean my plastic weed pipe?
No, avoid using boiling water on plastic pipes since high heat can warp or damage them. Stick to warm or room-temperature water for safe cleaning.
3. What tools are best for cleaning hard-to-reach areas in a plastic weed pipe?
Use small brushes like pipe cleaners, cotton swabs, or toothpicks to reach tight spaces effectively without scratching the surface.
4. How often should I clean my plastic weed pipe for optimal results?
Clean your pipe after every few uses to prevent buildup and maintain better airflow and taste during smoking sessions. Regular maintenance keeps it in good condition longer.


![Vessel Helix Pipe [Copper] - Headshop.com](http://www.headshop.com/cdn/shop/files/ad3c0443-b76d-4fe5-84b8-a617dd50a950.jpg?v=1747419387&width=900)
![Vessel Helix Pipe [Copper] - Headshop.com](http://www.headshop.com/cdn/shop/files/7b0e06e3-9106-4684-80e4-408362c34085.jpg?v=1747419388&width=1000)
![Vessel Wood Vape Pen Battery [White/Beechwood] + - Headshop.com](http://www.headshop.com/cdn/shop/files/4ecd5d0f-363a-454e-a7a0-229fb93bf456.jpg?v=1725470645&width=900)
![Vessel Wood Vape Pen Battery [White/Beechwood] + - Headshop.com](http://www.headshop.com/cdn/shop/files/d232e493-09e6-4574-b44c-3e2bde9425b4.jpg?v=1725470647&width=1000)

![Vessel Compass Apex Charger [Black] - Headshop.com](http://www.headshop.com/cdn/shop/files/f10e6bf4-6ce7-4a59-a50e-a4184f069754.jpg?v=1729115238&width=900)
![Vessel Compass Apex Charger [Black] - Headshop.com](http://www.headshop.com/cdn/shop/files/dce98c70-346c-405f-aca8-d59c7feed96d.jpg?v=1729115240&width=1000)
![Vessel - Helix [Black] Vessel - Helix [Black]](http://www.headshop.com/cdn/shop/files/Helix_Black_Front_1.jpg?v=1744308128&width=600)
![Vessel - Ember [Gold] Astray Vessel - Ember [Gold] Astray](http://www.headshop.com/cdn/shop/files/20220106_EMBER_BRASS.jpg?v=1744309601&width=600)
![Vessel Helix Pipe [Black] Vessel Helix Pipe [Black]](http://www.headshop.com/cdn/shop/files/Pipe_Black_Angle.jpg?v=1744306153&width=600)
![Vessel Pipe [Maritime] Vessel Pipe [Maritime]](http://www.headshop.com/cdn/shop/files/Pipe_Blue_Closed_982a0d7d-3acb-48ed-96ce-76b7acbe3677.jpg?v=1744306295&width=600)
![Vessel Element Hand Bubbler [Black] Vessel Element Hand Bubbler [Black]](http://www.headshop.com/cdn/shop/files/Element-Product-Listing-Images2.jpg?v=1744306952&width=600)
![Vessel Pipe [Maritime] - Headshop.com](http://www.headshop.com/cdn/shop/files/Pipe_Blue_Closed_982a0d7d-3acb-48ed-96ce-76b7acbe3677.jpg?v=1744306295&width=900)
![Vessel Pipe [Maritime] - Headshop.com](http://www.headshop.com/cdn/shop/files/Pipe_Blue_Open_d28f56b9-f5af-45fe-9636-ae8f20aec6f3.jpg?v=1744306297&width=1000)
![Vessel - Helix [Maritime] - Headshop.com](http://www.headshop.com/cdn/shop/files/Helix_Maritime_Front_1.jpg?v=1744307885&width=900)
![Vessel - Helix [Maritime] - Headshop.com](http://www.headshop.com/cdn/shop/files/Helix_Maritime_Front_2.jpg?v=1744307928&width=1000)
![Vessel Pipe [Emerald] - Headshop.com](http://www.headshop.com/cdn/shop/files/231c9f1f-11ba-4db3-aa3d-29b786d02e7f.jpg?v=1744745505&width=900)
![Vessel Compass Rise [Obsidian] - Headshop.com](http://www.headshop.com/cdn/shop/files/631009c0-e68c-4238-9a63-73f14dd1117f.jpg?v=1717545548&width=900)
![Vessel Compass Rise [Obsidian] - Headshop.com](http://www.headshop.com/cdn/shop/files/a12c8ff4-4bee-4dc9-b697-542f6130e46e.jpg?v=1717609092&width=1000)






![Pipe by Vessel [Gunmetal]](https://cdn.shopify.com/s/files/1/0585/8462/9443/files/Pipe_Gunmetal_Angle_500x500.jpg?v=1744306453)


