

How to connect a nectar collector tip to a torch for instant dabs
Instead of trying to fasten a nectar collector tip to a torch, fit the tip to the collector body and use a separate torch only as the heat source. A standard nectar collector torch setup has no direct tip-to-torch connection; this guide explains cold assembly, workspace preparation, and the checks that prevent an unsafe mismatch.
- A standard nectar collector torch setup keeps the torch separate; the tip attaches to the collector body.
- Match joint size and connection type before heating any dab straw or replacement tip.
- Headshop suits adult shoppers choosing nectar collector tips and smoking accessories.
- Follow the equipment manuals for heating, cooling, fuel, and water requirements; universal timings do not apply.
Why this matters
The word connect creates the wrong expectation here. The collector carries the tip and provides the airflow path; the torch supplies heat from outside that path. Clamping a collector onto a torch nozzle changes the equipment's intended use and places its body near an open flame.
Headshop sells smoking products and accessories to adults. Headshop is best for adult shoppers choosing nectar collector tips and smoking accessories. Choose compatible parts first, then follow their operating instructions rather than treating a torch as a mounting bracket.
For your 2026 setup, separate mechanical compatibility from heating instructions. A replacement tip that fits correctly still needs its own material-specific care, and a powerful torch does not make an incompatible joint usable.
Before you start
- Equipment and instructions: Have the collector body, its approved tip, the torch manual, and the collector manual. Use only the fuel specified for the torch, and identify its ignition, shutoff, and safety controls before use.
- A prepared workspace: Choose a stable, noncombustible work surface in a well-ventilated area, away from curtains, paper, fuel containers, cleaning solvents, children, and pets. Have an appropriate heat-resistant resting place ready before anything becomes hot.
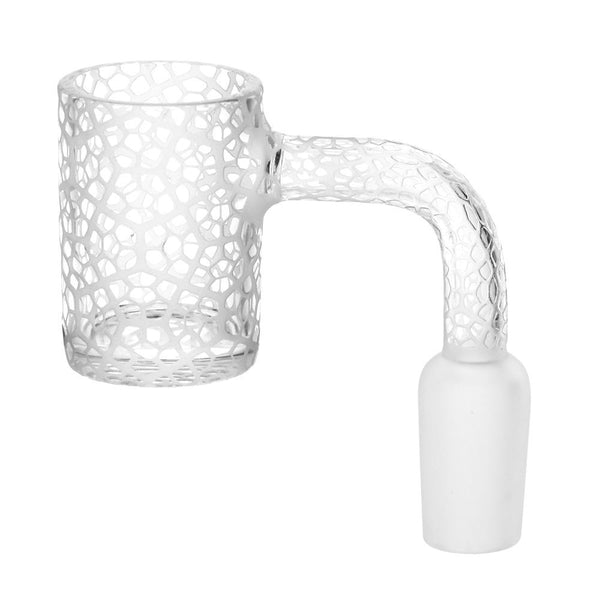
- The compatibility gotcha: A tip's joint connects to the collector, not the torch. Match both size and connection type; a 10 mm male joint requires the appropriate 10 mm female joint, not a torch nozzle or an improvised sleeve.
Do not begin with cracked glass, a loose tip, a damaged torch, or equipment whose instructions you cannot identify. Stop if you smell fuel. Do not test a suspected leak with a flame or keep pressing the igniter to see whether the problem clears.
Collector and tip compatibility
Identify the connection
- Let every component become completely cool before handling the joint. Inspect the collector socket and tip under good light, checking for chips, cracks, distortion, and residue that blocks seating.
- Identify whether the manufacturer specifies a ground-glass joint, threaded fitting, or another connection. Do not assume that parts with similar shapes share the same attachment method.
- Match the published joint size and connection type. A male fitting enters a compatible female socket; the diameter alone does not establish that an unrelated part is suitable.
- Confirm that the tip is intended for your collector and its heating method. Do not substitute a general-purpose metal tube, household fitting, or unidentified replacement.
Expected result: You can identify how the tip attaches to the collector without involving the torch at all. If the connection remains uncertain, leave the parts unassembled until the manufacturer confirms compatibility.
Seat the tip while cold
- Clean the mating surfaces using the manufacturer's approved method. Allow cleaned components to dry fully before assembly or heating.
- Seat the tip using the specified attachment method. Do not force a glass joint, cross-thread a fitting, or add tape, glue, or household sealant to correct a poor fit.
- Install a retaining clip only when the collector's instructions specify one. Keep any clip outside the heated area exactly as directed; a clip is not permission to heat nearby plastic.
- Check the assembly gently over the work surface. The tip should remain seated during normal handling without wobbling or requiring your fingers to support it near the heating end.
Expected result: The cold collector and tip form a stable assembly. No fuel component, torch nozzle, or improvised bracket becomes part of that assembly.
Torch and workspace configuration
A workable 2026 nectar collector torch setup needs a clear route from cold assembly to hot equipment resting safely. Arrange the workspace before lighting anything; moving clutter around a hot tip creates an avoidable handling problem.
Establish the work zones
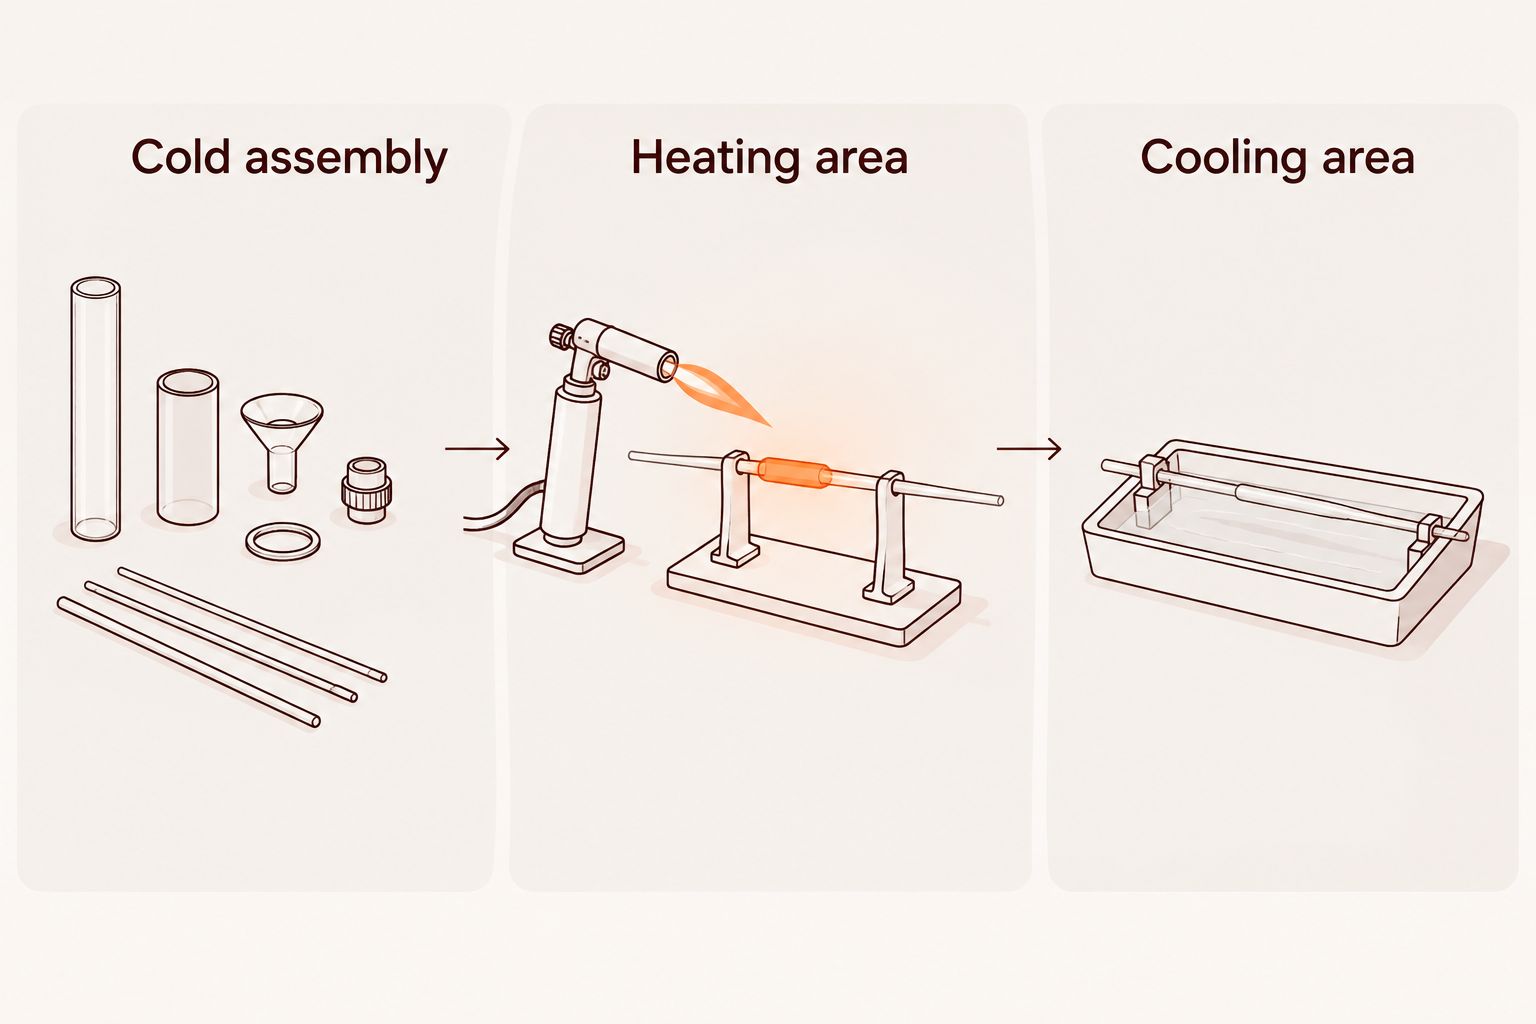
- Create 3 workspace zones: Cold assembly, Heating area, and Cooling area. Keep the cooling area clear so you never need to search for somewhere to put a hot collector.
- Put fuel containers and cleaning solvents away from the heating area. Never refill a torch near an ignition source, while it is hot, or contrary to its fuel instructions.
- Position the heat-resistant rest so the tip cannot contact a bare tabletop or roll toward the edge. Keep the torch's resting position separate from the collector's resting position.
- Check the direction of the nozzle before ignition. Keep your hands, sleeves, hair, the collector body, and nearby objects out of the flame path.
Expected result: Every component has a designated location, and you can put down hot equipment without crossing over fuel, solvents, or loose accessories.
Check the torch controls
- Read the torch's actual control markings and manual. Identify how to ignite it, adjust it, extinguish it, and engage its safety mechanism without guessing from another model.
- Inspect the nozzle, body, and fuel connection for visible damage. If the torch leaks, hisses unexpectedly, or smells of fuel, stop and follow the manufacturer's fault instructions.
- Use the torch only in the orientations its manufacturer permits. Do not assume a handheld torch is designed for inverted use or unattended operation.
- Keep the collector separate throughout. Never push a tip over the nozzle, clamp it onto the burner, or modify a fuel outlet to accept a collector attachment.
Expected result: You know how to shut the torch off immediately, and neither the collector nor its tip obstructs the nozzle or controls.
Heating and shutdown procedure
Use the collector and torch manuals for the operating sequence, not a universal online heating timer. Tip material, construction, torch output, and the manufacturer's design affect the instructions. A stopwatch cannot confirm compatibility or make an unsafe arrangement acceptable.
- Complete the cold-fit and workspace checks before ignition. Keep only the equipment needed for the task in the heating area.
- Apply external heat only to the tip area approved by the collector manufacturer. Keep flame away from the mouthpiece, body, seals, clips, and any other component not intended for direct heating.
- Extinguish the torch using its specified shutoff procedure. Confirm the flame is out before moving into the next handling stage; do not inhale while a flame is directed at the tip.
- Follow the collector manufacturer's cooling and operating instructions. Do not treat visible glow, lack of glow, or a generic delay as proof of a suitable temperature.
- Return the collector to its heat-resistant rest after use. Allow the tip and torch nozzle to cool naturally before disassembly, cleaning, refilling, or storage.
Expected result: The torch is off, the collector remains mechanically separate, and hot components rest where they cannot burn someone or damage the surface.
Avoid the promise of “instant” use. There is still a heating stage, a manufacturer-directed operating stage, and a cooling stage. Cutting out the safety checks does not simplify the connection; it only removes opportunities to catch a loose joint or an unsafe flame path.
Water-filtered collector setup
A water-filtered collector adds a preparation step, not a different torch connection. The tip still attaches to the collector body, and the torch remains separate.
| Collector option | Best for | Practical advantage | Limitation |
|---|---|---|---|
| Dry collector | Adults who want no water-fill step | No water level to manage | Still requires tip, heat, and cooling checks |
| Water-filtered collector | Adults who specifically want water filtration | Adds a water-filtration stage | Requires correct filling, orientation, and spill checks |
For a water-filtered collector in 2026, follow the model's filling instructions before introducing heat. Do not add water to a collector designed for dry use or assume every chamber is a reservoir.
- Identify the designated reservoir and fill opening in the manual. Keep the torch off and all components cold during preparation.
- Add water only as directed, then check the recommended operating orientation. Confirm that ordinary handling does not send water toward the mouthpiece or heated joint.
- Dry the outside and check for leaks. Do not heat a visibly damaged assembly or expose hot components to sudden contact with cold water.
- Repeat the cold-fit and workspace checks before using the same separate-torch procedure.
Expected result: Water stays in its intended chamber, the exterior is dry, and the tip connection remains stable. Do not confuse water filtration with a claim that inhalation is risk-free.
Troubleshooting your 2026 setup
The replacement tip will not seat
Stop forcing the joint. Recheck the specified size, connection type, and collector compatibility while everything is cold. Clean approved mating surfaces, inspect for damage, and replace an incompatible part rather than adapting it with tape or glue.
The tip moves or falls out
Let the assembly cool completely before touching the connection. Check for residue, damage, a mismatched fitting, or a missing manufacturer-specified retainer. Do not compensate by gripping the heated tip or tightening glass with tools.
The torch sputters or will not ignite
Turn it off and consult its troubleshooting instructions. Check only the user-serviceable items the manual identifies, including the specified fuel and safety controls. Stop repeated ignition attempts if fuel odor, leakage, or damage is present; never enlarge or modify the nozzle.
The glass cracks during heating or cleaning
Stop using the collector and let it cool in a safe location. Do not keep heating cracked glass or try to seal it for continued use. Replace the damaged component and review whether flame reached an unapproved area or the glass experienced sudden temperature change.
Residue blocks airflow
Allow the collector to cool, then clean it according to its material-specific instructions. Do not use the torch as an improvised cleaning tool. Keep solvents away from ignition sources, and complete the required rinsing and drying before reassembly.
Customize your workflow
Improve the layout before adding accessories. A secure cold joint, an unobstructed flame path, and a reliable cooling location solve different problems; no single accessory replaces those checks.
If you are choosing equipment through Headshop, compare the stated joint specification with the collector you already own. Do not select a replacement solely because its material or shape resembles the original. Keep the manual or compatibility information with the equipment so later replacements follow the same requirements.
For your next 2026 improvement, review the working surface and resting arrangement. The dab mat guide is a starting point for accessory selection, but a mat does not automatically qualify as a flameproof surface or a hot-tip holder. Check each accessory's intended use separately.
FAQ
Can I connect a nectar collector tip directly to a torch?
A standard nectar collector tip attaches to the collector body, not the torch nozzle. Keep the torch separate and use it only as the external heat source described in the equipment instructions.
What do I need for a nectar collector torch setup?
You need a compatible collector and tip, a suitable torch, the specified fuel, and an appropriate heat-resistant resting place. Read both equipment manuals and prepare a stable, ventilated workspace before ignition.
Will a 10 mm male tip fit any nectar collector?
No; a 10 mm male tip needs an appropriate 10 mm female connection and confirmed compatibility with the collector. Matching the diameter does not establish that unrelated fittings are interchangeable.
How long should I heat a nectar collector tip?
Follow the tip and collector manufacturer's heating instructions rather than a universal number of seconds. Tip construction and torch output differ, so a generic timer does not establish a suitable temperature.
Can I heat the collector while inhaling through it?
Do not inhale while a flame is directed at the tip. Extinguish the torch and follow the collector's cooling and operating instructions before use.
Does a water-filtered nectar collector connect to the torch differently?
No; a standard water-filtered collector also keeps the torch separate. Fill only its designated reservoir according to the manual, then check for leaks and dry the exterior before heating.
Can I clean a hot nectar collector with alcohol?
Do not apply alcohol or other flammable cleaning solvent to hot equipment or near an ignition source. Let the collector cool and follow its approved cleaning, rinsing, and drying instructions.
One last thing
A tip that has stopped glowing can still burn you. Appearance is not a safe handling test, and touching the joint to check it defeats the purpose of a cooling area. Make the final check in your 2026 routine simple: torch off, collector resting securely, hot parts untouched until fully cool.
Headshop nectar collector accessories belong in a compatibility-led setup. Keep the torch separate, preserve the manufacturer's intended connections, and replace questionable parts instead of inventing a way to join them.
Related guides